Wood Burning Stove
After the steels and new roof, the installation of the stove feels like the best biggest landmark. To finally have heating again feels great. We decided to install the stove ourselves and ask the Building Inspector to sign it off as we were not HETAS registered. This has been a fairly straight forward process. We added a wood stove to our initial building control application when we paid our fee.


After quite a bit of research we decided on the Dik Guerts Ivar 8 Store stove from the Stovefitters Warehouse. The website is hugely informative and gave us the confidence to fit the stove ourselves. We also used the same company to design our flue. You give them a set of measurements and they send out the flue parts you need. The flue is Duraflue twinwall. We needed a 6 inch flue.
We ordered a slate hearth online. It was quite tricky making sure we had met all the building regulations for hearth size, but again there is lots of info online about this. Or you can check out the Building Regulations Part J directly, which are fairly straight forward.
We did actually mess up with the measurements we gave for the flue design as I gave the pitch of the new roof not the old roof so the design we were given did not clear the eaves. But all was not lost, we changed bits around and managed to resolve it.
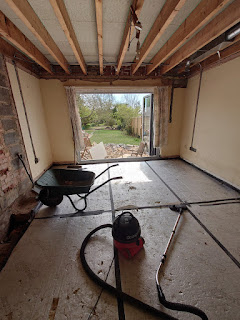
Initially we laid all the bits out. Then we put the stove on the heart with some underlay between so as not to damage the hearth during the installation. We had to put an extra bit of floorboard under the hearth to make up the 18mm we would need for the new woodfloor and underlay when we eventually laid it.
We then marked where the hole for the flue was going and the external air supply pipe. We required a dedicated external air supply because we were aiming to make the house air tight for the MVHR system. We were not going to have any trickle vents on the windows.
Drilling the hole out for the flue was tricky with the equipment we had. Ideally you need a core drill (which we later borrowed and made life a lot easier).
The Duraflue just clips together, no need for any fire cement. We had been supplied with some fireproof webbing which we used where the vitreous pipe connected to the duraflue to give a tighter fit. The Building Inspector came to visit the next day and gave the ok. He said it would be formally signed off with everything else at the end.


Comments
Post a Comment