Posts

Installing the MVHR machine

Image
Finally, our MVHR machine and ducting parts had arrived from Green Building Store. They had a long wait in the queue to get to design stage and then a long wait for the parts to arrive. We couldn't progress much further without it so we were keen to get it installed. The machine we had been recommended by the Green Building Store was the Ubiflux Vigor 325. As a GBS windows customer we received a 10% discount on MVHR materials. Perhaps you haven't heard of Mechanical Ventilation with Heat Recovery (MVHR) so he's a quick summary:  MVHR (Mechanical Ventilation with Heat Recovery)   provides fresh filtered air into a building whilst retaining most of the energy that has already been used in heating the building . Heat Recovery Ventilation is the solution to the ventilation needs of energy efficient buildings. Mechanical ventilation with heat recovery (MVHR), heat recovery ventilation (HRV) or Comfort ventilation are all names for the same thing.   A heat recovery ventilation sy
Kitchen install

Image
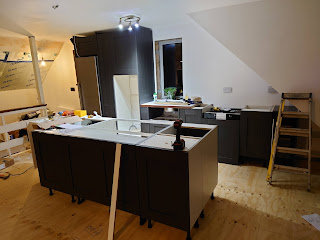
The kitchen arrived assembled in boxes from Wren kitchens and the team carried it up the stairs. Jake's friend, Ben, came down from Stoke to help install the kitchen. First we needed to do a bit of plumbing and fix the last remaining floorboards down. And also add a layer of ply as we were planning to have a Karndean type floor (LVT) and it was easier to put the ply base layer down first before the kitchen. The kitchen install was fairly straight forward with the use of Ben's cutting tools and experience. Most of the cabinets were on floor level. We just needed to get the island in the correct place. We added knobs and handles later. Wren kitchens came back the following week to survey for the worktop template. They then came back to install the quartz worktop 12 days later. We had paid for a full 3m length worktop for the island but the surveyor said the team would not be able to carry it up the stairs in once piece. We had the choice of getting it up the stairs ourselves or h

Window install

Image
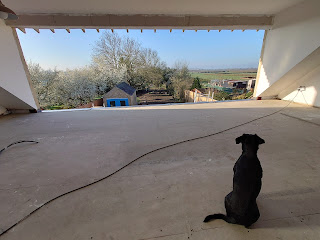
 The big day had arrived. The team from Green Building Store were coming to install our large sliding window/door on the first floor. There were so many unknowns and potential issues that it was quite a nerve wracking day. We were worried that the surface we had provided would not be smooth enough for the window lifting machine. But this worked ok. The team had a practice with the machine, lowering the temporary windows we had installed in the hoarding. It had a bit of wobble and the arm was stretched at its maximum so it wasn't ideal. The frame was taken up the stairs in bits and assembled on the first floor. The three window panels were lifted up one at a time. We had got the height measurements of the opening perfect which was good news. The side measurements on the hand were a bit tight since we had plastered the dormer cheeks. But the team got the window in. The aluminium sill they provided looked naff on the first floor. They are usually fitted on a ground floor. We opted not

Lead sill detail

Image
 We had agreed with the window surveyor that we were going to create a sill with 25mm plywood and lead. The amazing Tod was the brains behind this bit. He drew up a plan initially so we could show the window surveyor and also did the lead welding. We used code 5 lead as this was quite a large area to cover and needed a higher quality lead if it wasn't going to crack. We used 5 pieces and joined them with a seam. This did mean that it wasn't a completely flat base for the window and the installers would require packers.  We were very pleased with the outcome.

Steel for juliet balcony installed

Image
Before the window install we needed to put the steel bar that was going to hold the juliet balcony in place. Kieith Collier measured the spacing of the joists where the balcony was going (middle window section) and manufactured the steel with fins that attach to each joist with a thermal isolation pad (Farrat TBK) to stop heat transfer. We also gave him the juliet balcony support rail so he could put the bolt holes in the correct place. The steelwork was then galvanised. Also, Keith informed us, that because of the galvanisation process the balcony support which is aluminium, would need to be separated with some damp proof membrane as aluminium and galvanised steel don't do well together.

Driveway gates up

Image
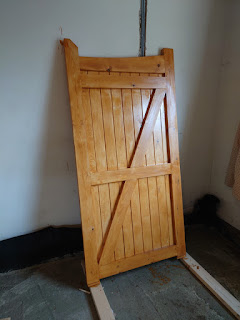
 We ordered the driveway gates from Gates Near Me in Fowlmere. I think there was about a 12 week lead time. I painted them in Sikkens Cetol HLS base coat (3 coats) and Sikkens Filter 7 plus top coat (2 coats) as recommended (breathable and UV filter). They weren't easy to install as they had to open up onto a sloping driveway. We added in a Suffolk latch. All the gate furniture came from BJ Waller up the road in Stretham.

Airtight loft hatch

Image
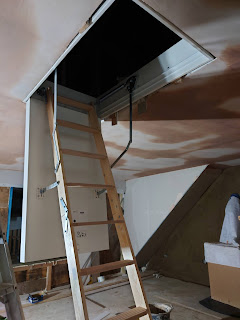
 We installed an airtight loft hatch: the Dolle Clickfix Pro   which seemed to have great reviews and was cheaper than the other well known Wellhofer attic hatch and looked very similar. In hindsight we should have installed the frame before plastering. We will now have to make good and ensure airtightness right up to the frame before putting on the architrave around the hatch. Once we had got the frame square it was fairly installing the ladder and the instructions were straight forward.